
How to Create Your Linktree; ways to organize the web links and connect with your Instagram account, the whole process of setting up to be described

Have you ever heard of a service called “Linktree”? Many of you might have an account on different social media platforms. With Linktree, you can put together those multiple web links on one page for your convenience.
Linktree is just the right service for those who:
- Want your followers to know more about your media
- Want to increase the access to your media
In this article, we would like to describe how to create and set up your Linktree page. We hope this article will be a help for your page!
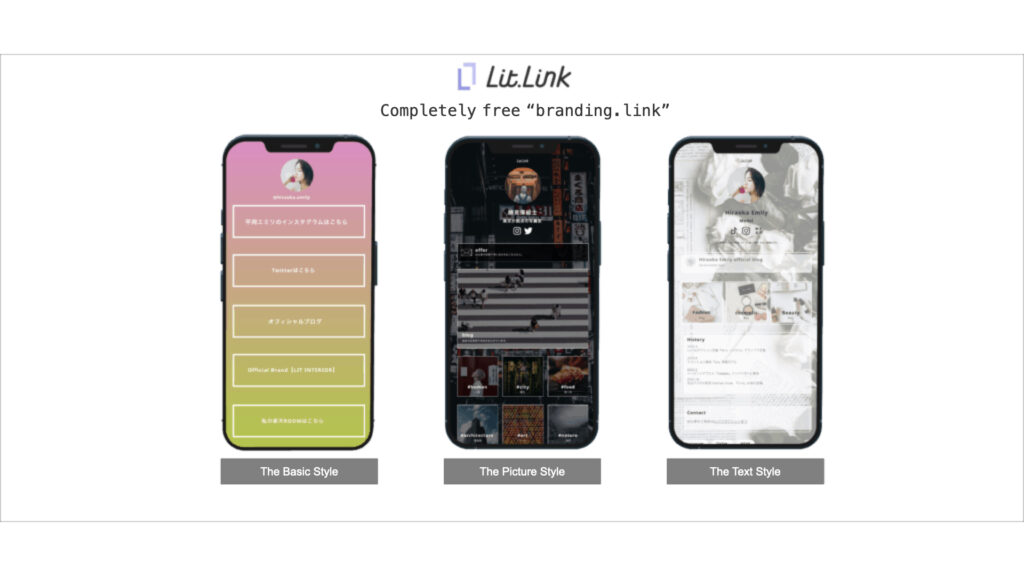
Lit.Link is a tool for creating profile links where you can “publish as soon as edited” the web links for your social media, YouTube videos, or introducing products.
There are various kinds of buttons you can choose from, and this is a service that is becoming very popular even among artists and celebrities.
You can create such a handy page!
First, we would like to introduce what exactly you can create with Linktree. Knowing the final product allows you to easily get on with the process of creating your page.
Following is the example of completed page created with Linktree:
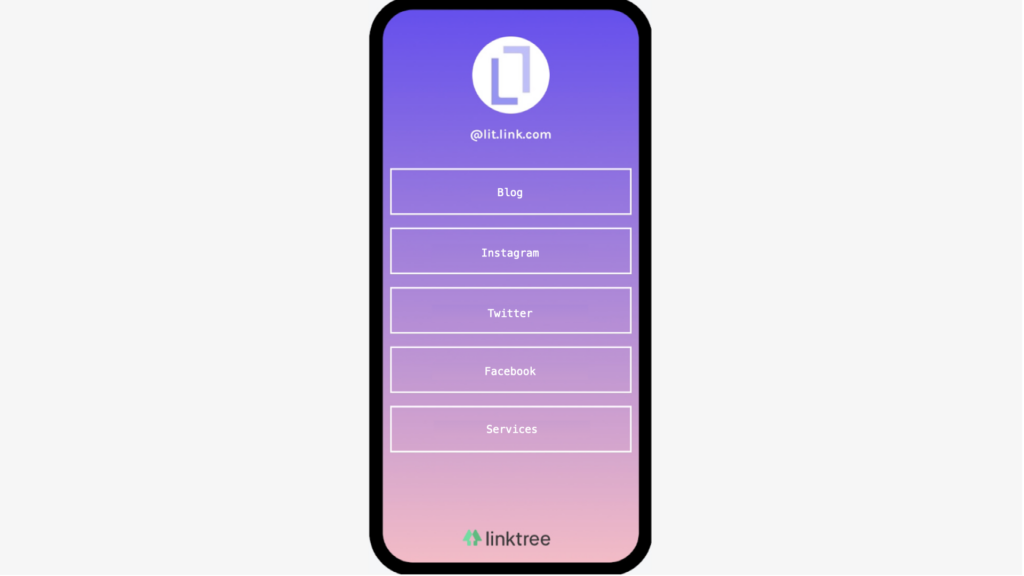
As seen above, you can compile multiple web links on one page. By using Linktree, you can create a stylish page very easily even without prior knowledge.

Which social media link can you put together?
With Linktree, you can introduce multiple media to the users. Here are some examples:
- Websites you manage
- Instagram account
- Twitter account
- Facebook account
- YouTube videos
- LINE@
- Career and Portfolio
You can boost the access to your links because all of these can be displayed on just one page.
Only one link is available for Instagram page
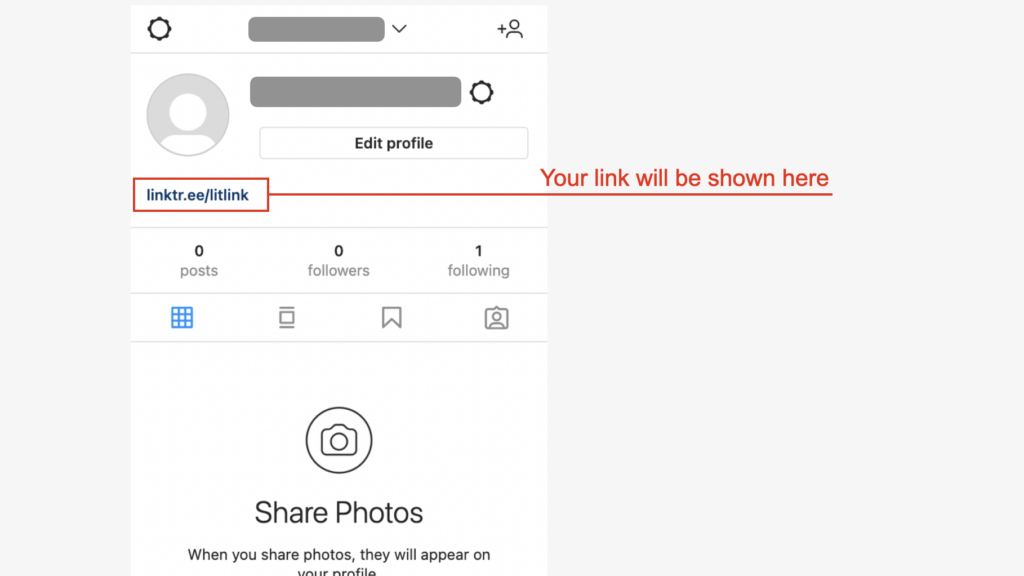
On Instagram, you can attach a link to your media in the biography as shown below.
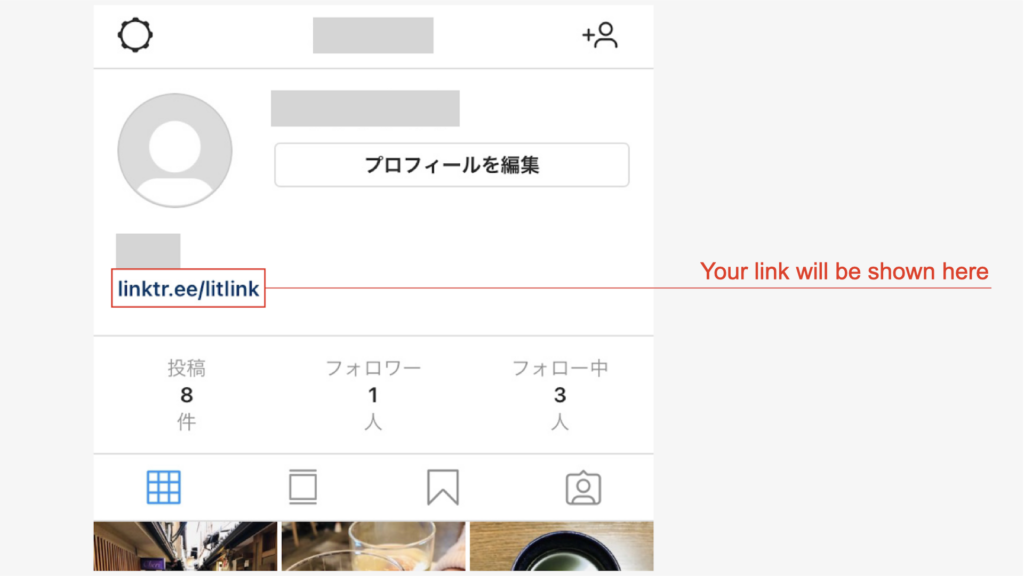
However, only one URL is available to show on your profile page, which makes it one of the disadvantages. With Linktree, you can fix this problem caused by Instagram specification. This may be one of the reasons Linktree has been popular.
How to sign up for Linktree
From here on, we would like to walk you through the process of signing up. The process itself is very easy for any one of you.
Following is the easy-to-understand explanation on getting started. If you plan to sign up, please use it as a reference.
Access the Linktree website
To use Linktree, you need to create your account on the website. Visit the following link: https://linktr.ee/
You will see a screen shown below. Tap “GET STARTED FOR FREE” or “SIGN UP FREE” in the upper right corner.

Enter your personal information
Now, enter your personal information. Following is the information you need to provide:
- email address
- username
- password
- password (for confirmation)
Tap Register at the bottom once you enter all the information.

Choose an account name and the categories
Once you are done filling in the personal information, you will need to choose an account name and the categories. You can select up to 3 categories, so choose the ones you like.

After you enter everything, you would have to confirm that you are not a robot through CAPTCHA. Follow the instructions shown on a screen and complete the process.
Choose your plan
After you confirm that you are not a robot, you will proceed to choosing your plan. There are two plans: Free and PRO.
PRO is as shown below. If you want to use Linktree with a charged plan, tap on “Make me a Linktree PRO.”

On the other hand, the Free plan is as shown below. If you want to use Linktree for free, tap “Continue with Free.”

When choosing your plan, you might wonder what the differences between these two plans are. Following features are available in PRO plan, so you might want to check them out in advance.
- Deleting the logos
- Checking the views and accesses to your links
- Adding the icons
- Adding the background theme
- Adding thumbnails
- Playing the videos
If you want to use the features listed above, PRO plan is just the right plan for you. Though, Free plan provides a service that is adequate for your daily use. If you cannot be 100% sure which plan to choose, start with the Free plan.
Succeed!
Once you are done with all the processes mentioned above, you would have succeeded setting up your account. It may seem difficult due to the all-in-English display, but anyone can sign up if you follow the procedure shown above.

The page will be redirected to the one shown above once you’re done, and now you can set up your links. Tap Continue to move on.
How to create compilation page with Linktree
Now you can create a compilation page on Linktree. By typing link titles and URLs, you can create your own link page. Plus, you can make it far more stylish with an image and background designs.
It may be hard to understand since the set up screen is also in English. Below is the explanation on the link setting.
Register your link
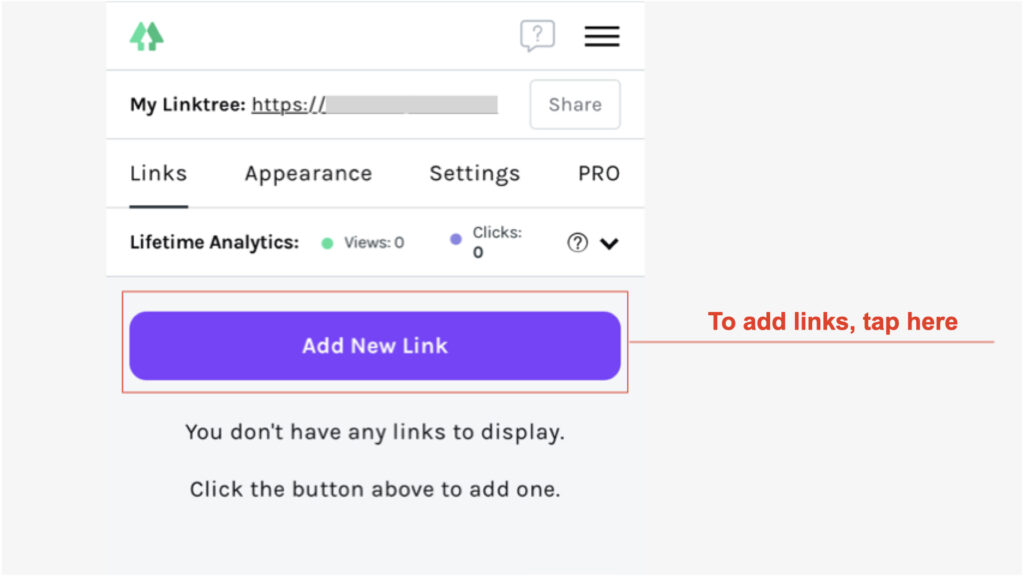
First, start with link registration to your media from the Linktree account. After you log in to your Linktree account, tap “Add New Link.”
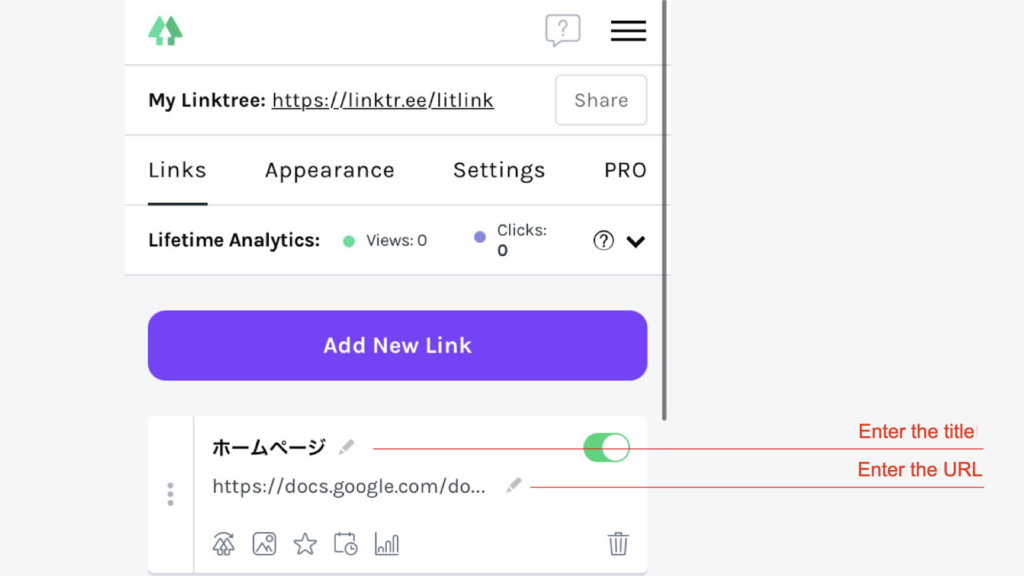
Type the link title and the URL
Now enter the link titles and the URL you want to display on the page. You will find white boxes at the bottom, so enter in each.
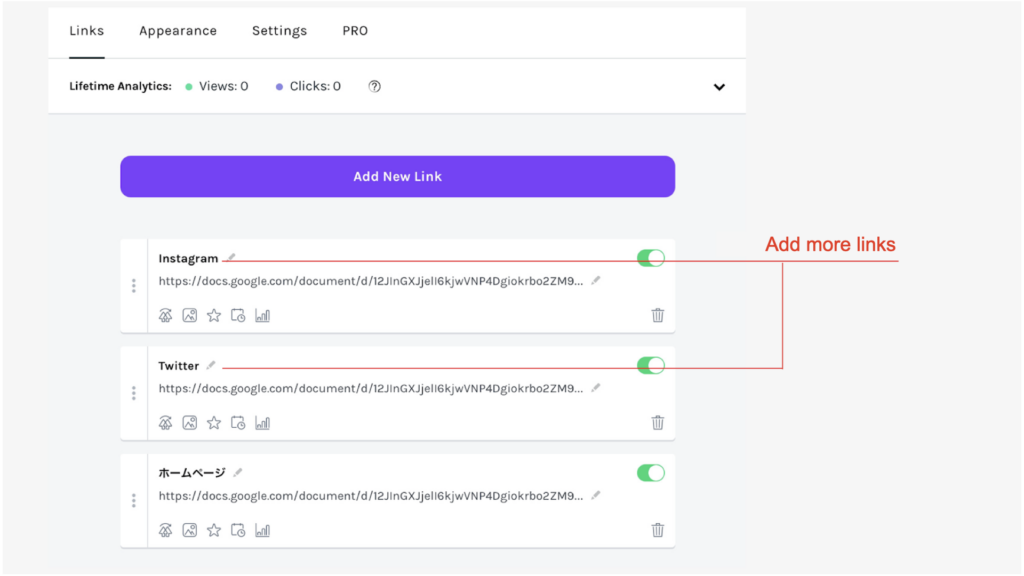
Add multiple links
If you have several media and want to add multiple links, you can repeat the process above.
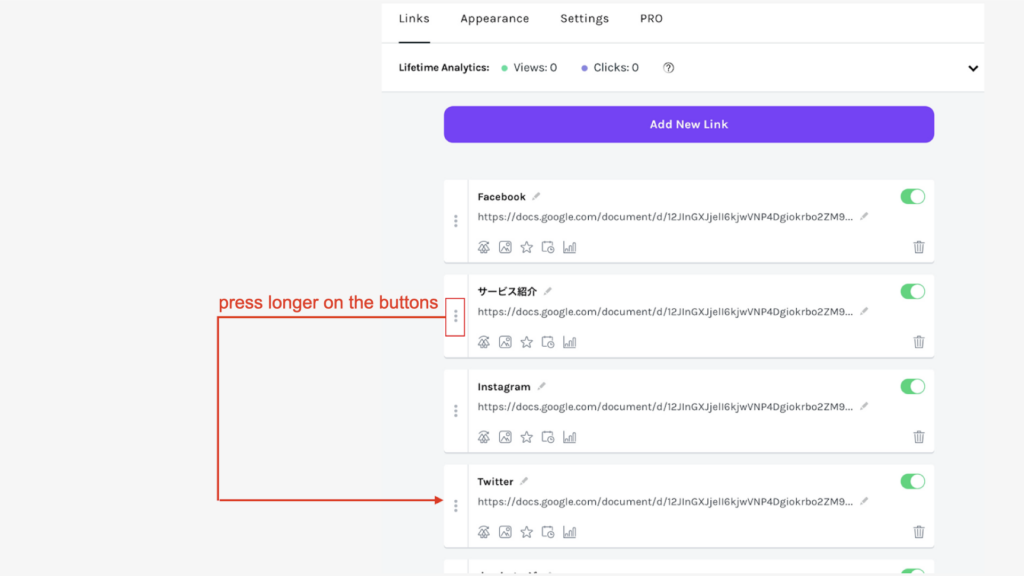
Arrange the link placement
The links will be shown in the order you type them in. You may want to change the order of them. If you want to change the order, press longer on the buttons on the left side of the links. Press longer on the buttons and slide to arrange the link placement.
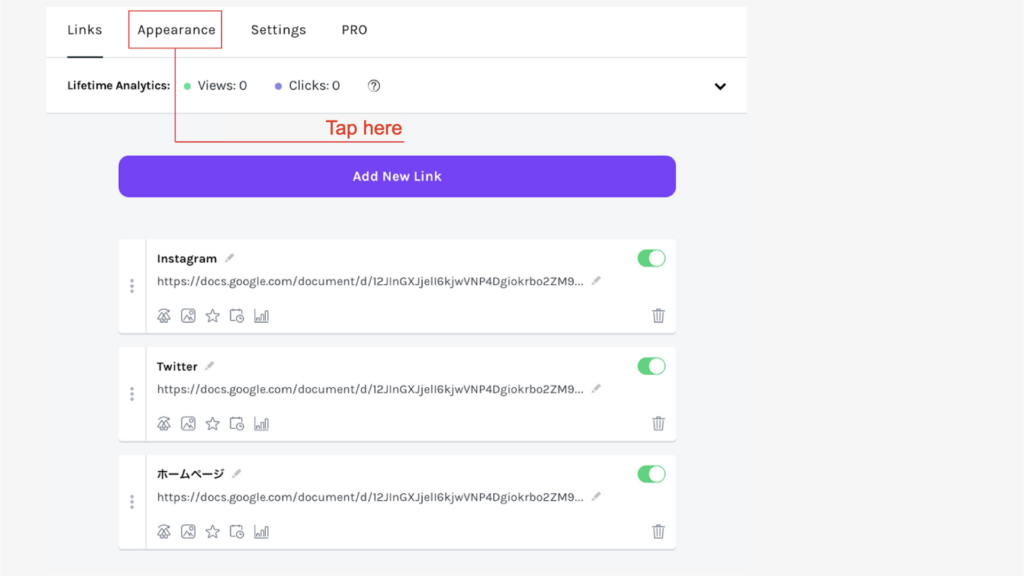
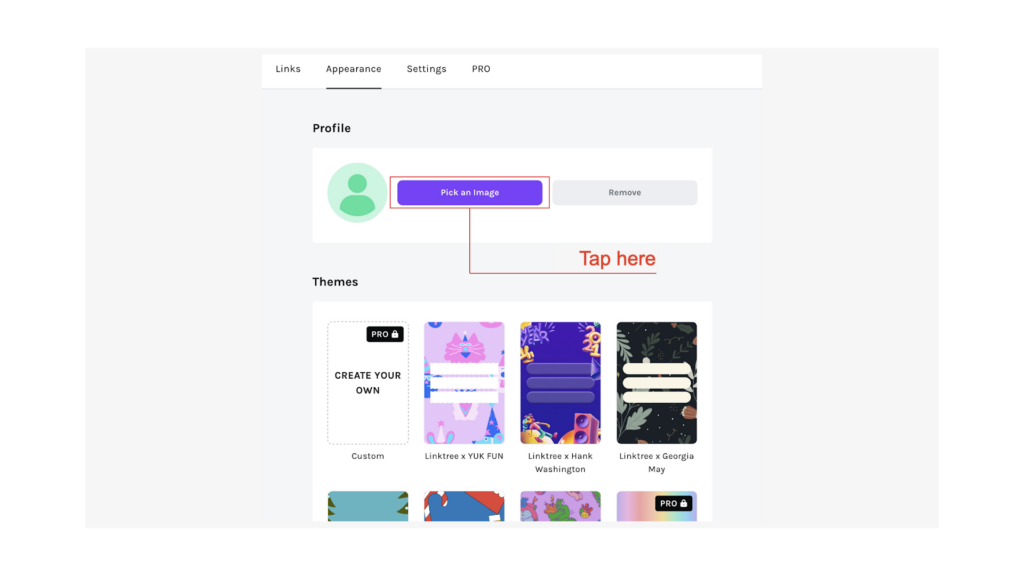
Set your icon image
Once you’re done setting the links, you’re now designing the page. First, set your icon image. Tap Appearance.
You will see a screen like below, then tap Pick an Image.
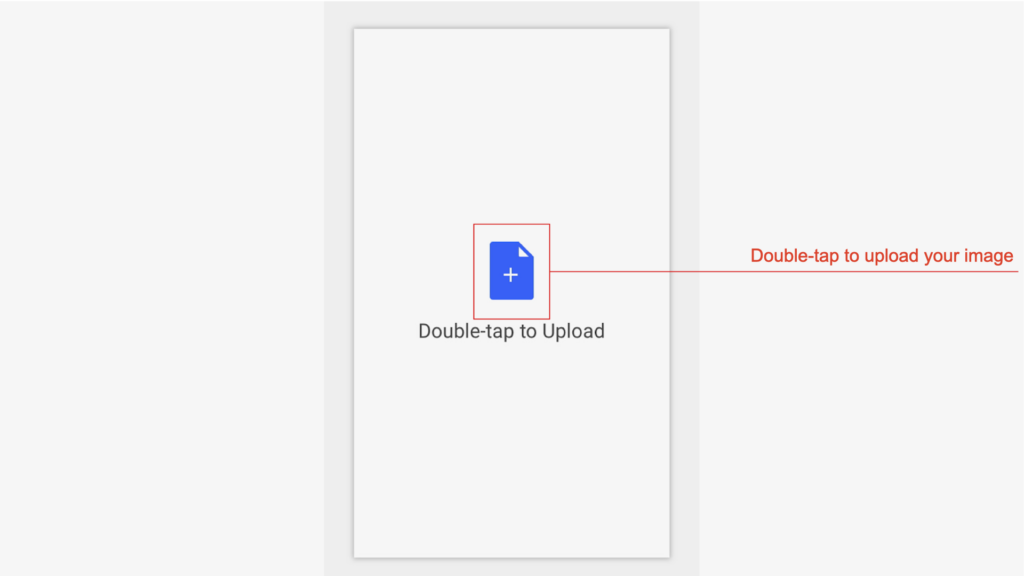
Now click the + mark in the middle on the image upload screen, and upload your picture.
Set your theme image
Lastly, you’ll set the theme for your link page. Several templates are provided for you to start, so select the one you like.
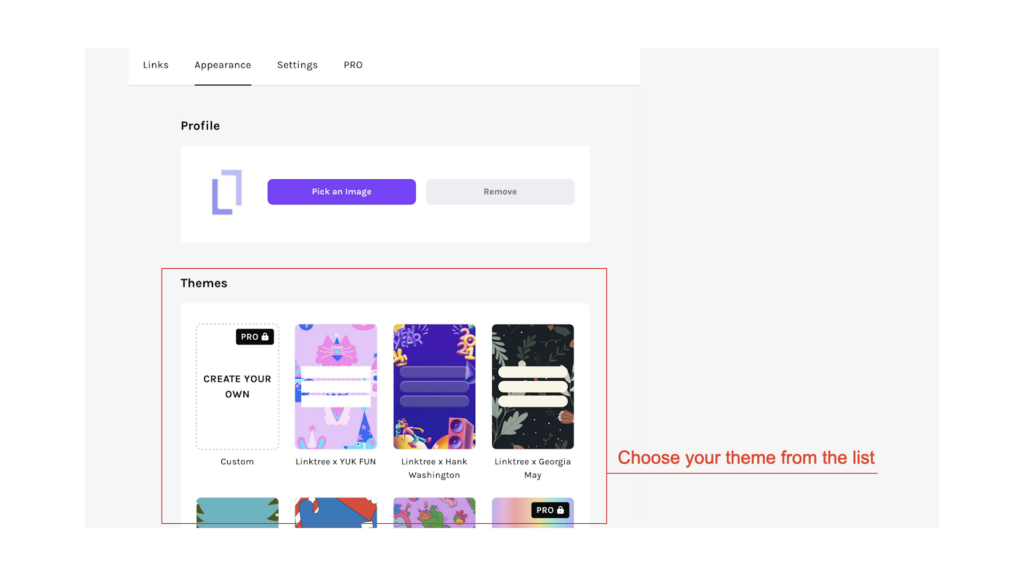
Designs with PRO tag on upper right are only available for the users with charged plans, and users with the Free plan cannot choose those. Follow the procedure to create your link compilation page as shown below.
How to connect Instagram and Linktree
We have established the registration for Linktree and set up the links so far. Now, in order to connect Linktree and Instagram, you would need to set up using your Instagram account. Follow the steps described below.
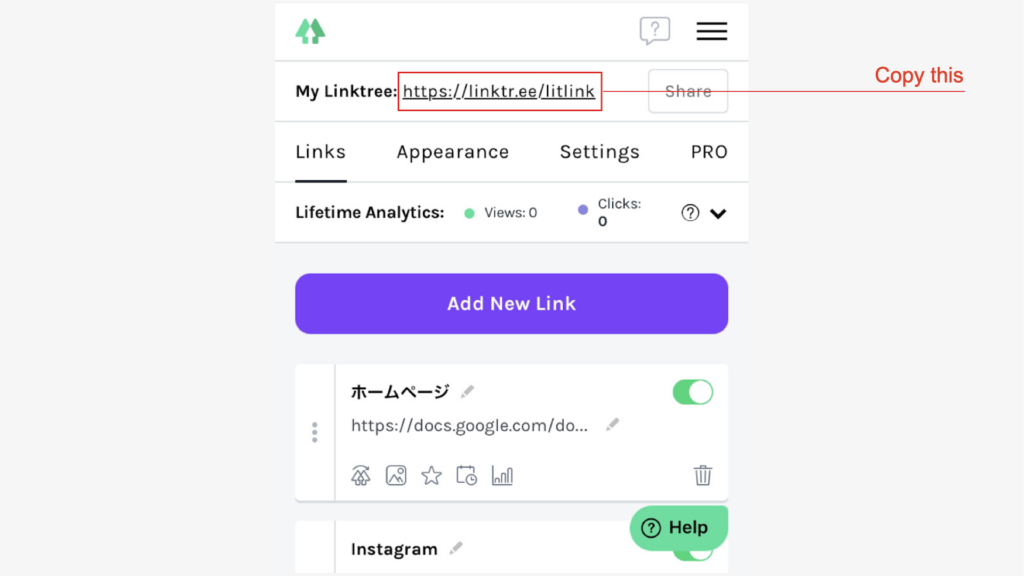
Copy the URL to Linktree
You need to copy and paste the URL to your Instagram to connect Instagram and Linktree. Log in to Linktree first, and copy the URL on your account screen.
Log in to your Instagram account
Log in to your Instagram account once you copy the URL of Linktree. Tap “Edit Profile.”

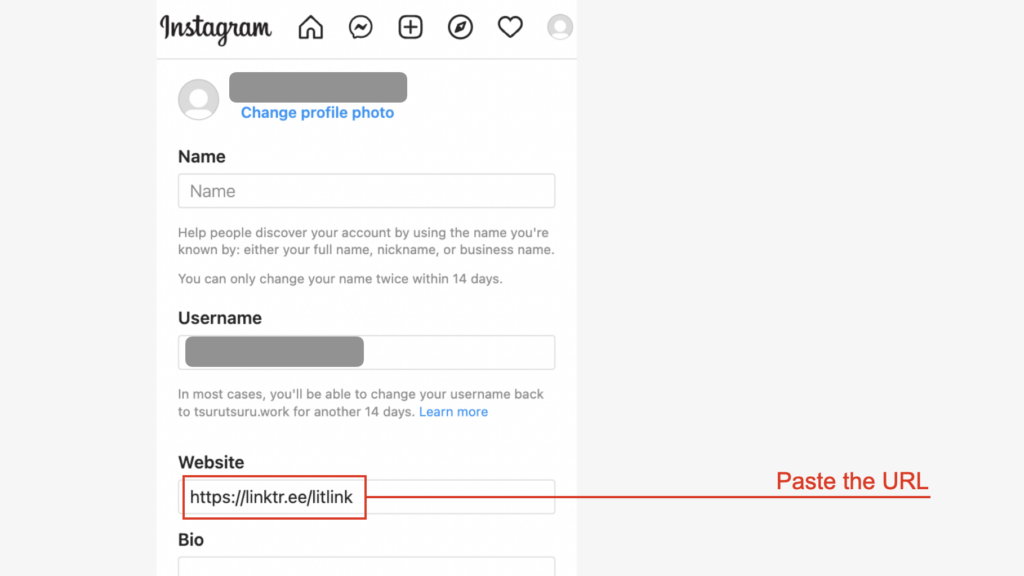
If you see a screen like below, then paste the link you copied into the box called “Website.”
Summary
With Linktree, you can compile your links on one page as described above for your convenience. If you have multiple media, you can increase the access to your media since the page allows other users to view them more easily.
However, Linktree website is mostly all in English. It may be difficult for some of you to sign up your account and set up the links. If you have trouble getting started, please do refer to the steps explained above.
Linktree surely is the best choice to create a page a lot easier to view for your users!

![[Card Tutorial] How to make an Aesthetic Anime Card Template](https://hintus.lit.link/wp-content/uploads/2022/08/Eye-catching-image-of-carrd-tutorial-min-150x150.jpg)


![[Card Tutorial] How to make an Aesthetic Anime Card Template](https://hintus.lit.link/wp-content/uploads/2022/08/Eye-catching-image-of-carrd-tutorial-min-300x157.jpg)


![[Updated in 2022] 10 Recommended Alternatives to Linktree](https://hintus.lit.link/wp-content/uploads/2022/09/linktree-alternatives-eye-catching-image-min-300x157.jpg)
